[VMware] Automatically deleting VMware VM snapshots
Automatically deleting VMware VM snapshots with vRealize Operations Manager (vROPs) is very easy to implement. This has been a common request to our engineering team and we would like to show you how to achieve this.
Requirement: Delete Snapshots automatically
In one of our recent projects, one of the requirements was a solution to automatically remove outdated VMware snapshots after a certain period of time. The customer wanted this automated feature because snapshots were often misused in the past and also often forgotten. This caused the VM to take up twice the storage capacity it had been allocated, and performance dropped as well.
The requirement posed by the customer was:
- Raise Attention if VM Snapshot is 5 days old
- Raise more Attention if VM Snapshot is 10 days old
- If VM Snapshot is 15 days old, delete it automatically
Solution: Use vRealize Operations Manager to fulfill the requirement
In the project mentioned above, we had used VMware Cloud Foundation. This meant we had access to the complete VMware vRealize Suite. Due to the required warnings at the intervalls of 5 and 10 days we decided to use vRealize Operations to implement the solution.
To achieve this, we need to create custom elements in vRealize Operations:
- Custom Symptom Definitions
- Here the age of the snapshots is set to be able to react to them
- Create Custom Recommendation
- Here the automation (action) is applied
- Custom Alerts
- Here, the two elements mentioned above are combined into one alert
Afterwards we’ll need to edit a file on the appliances that will allow the automated action and make vRealize Operations aware of our changes.
Let’s take it step-by-step.
Creating custom Symptom Definitions
In order to watch for the three specific snapshot ages we will create three symptoms.
Go to Alerts .. Configuration .. Symptom Definitions

Here use the filter on the right-hand side to search for “snapshot”.
Clone the “Virtual machine has disk snapshots for a long time” Symptom.

Here we give our Symptom a name and specify the poperty value for the age. We used: “[soulTec] Virtual machine has disk snapshot for 5 days” and set the property to 5.
Repeat these steps for as many ages as you need as symptoms. We created three symptoms for 5, 10, and 15 days, respectively, and used “Warning”, “Immediate” and “Critical” for each.
Create Custom Recommendation
In order to automate the reaction to the detection of 15 days old snapshots we need to create a custom Recommendation that has the appropriate action attached.
Go to Alerts .. Configuration .. Recommendations
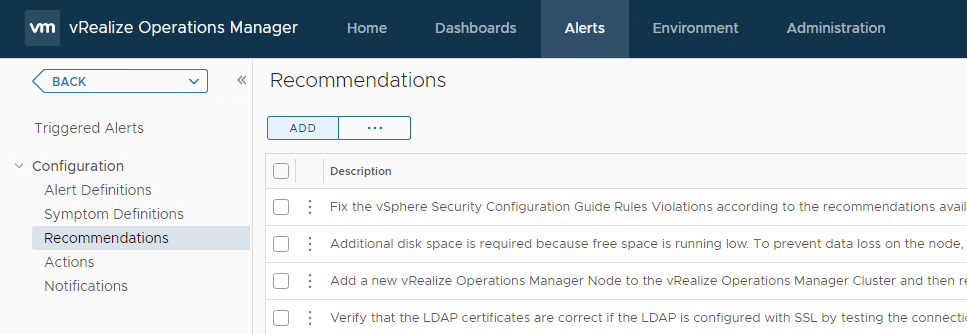
Here click on the “ADD” button to create a new recommendation.
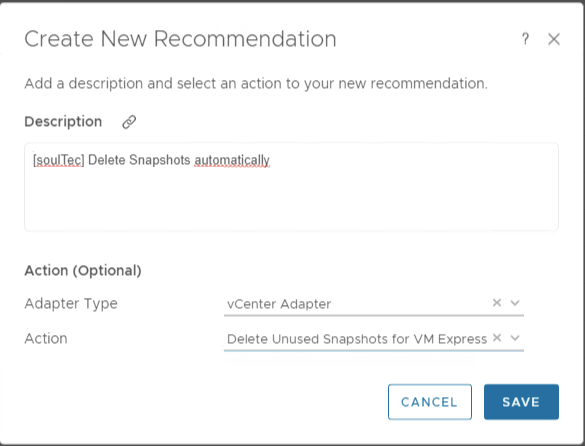
Give you new recommendation a fitting description so you can find it later. On the bottom configure the “vCenter Adapter” and choose the action “Delete Unused Snapshots for VM Express”. There is one without “Express” so be careful, the automation only works with the Express action as this does not require any parameters.
Create Custom Alerts
In this step we will put together the two elements we created to form new alerts that vROPs will attach to VM objects that fulfill our Symptom Definitions.
Go to Alerts .. Configuration .. Alert Definitions
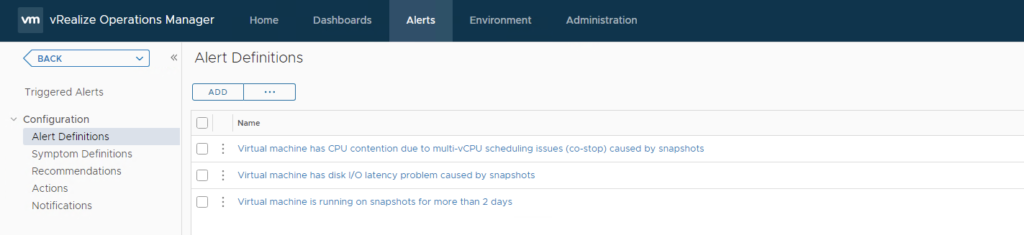
Use the filter search filed on the right hand side to filter for the name “snapshot”.
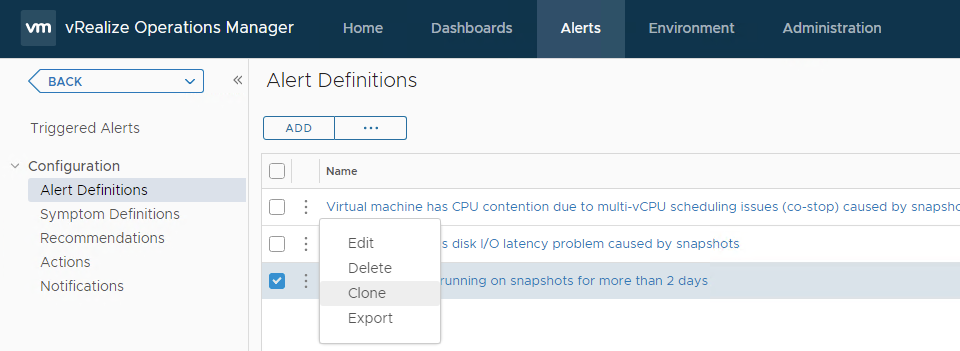
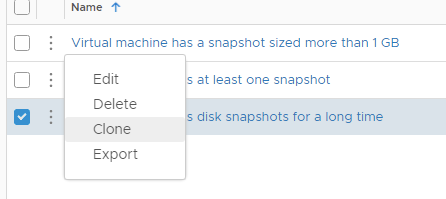
Click on the three dots next to the Alert Definition “Virtual Machine is running on snapshots for more than 2 days” and select “Clone”.
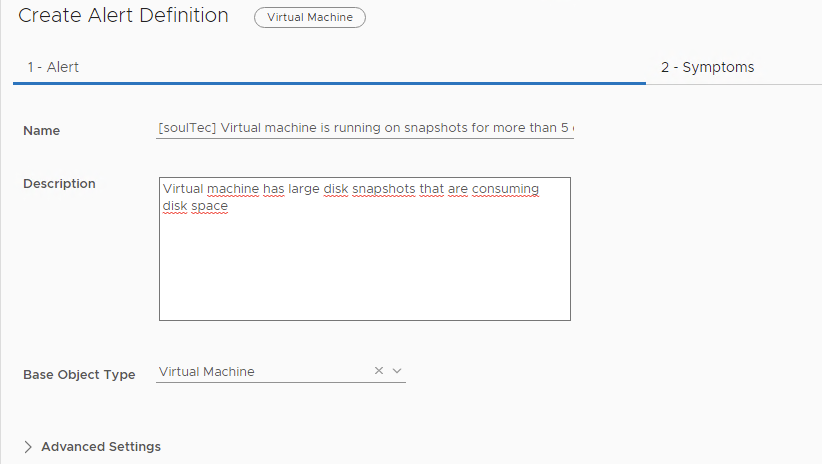
Under “1 – Alert” put in a name that describes what kind of alarm this is. We have used “[soulTec] Virtual Machine is running on snapshots for more than 5 days”.
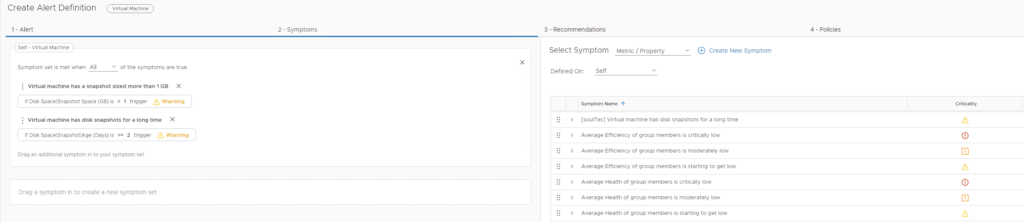
The “2- Symptoms” will look simlar to the above screenshot. We want to delete the provided Symptom and use one of the Symptoms we created earlier. So click on the “x” inside the Symptom Description on the left hand side and afterwards drag the appropriate Symptom from the list on the right over to the left side to where it says “Drag a symptom in to create a new symptom set”.
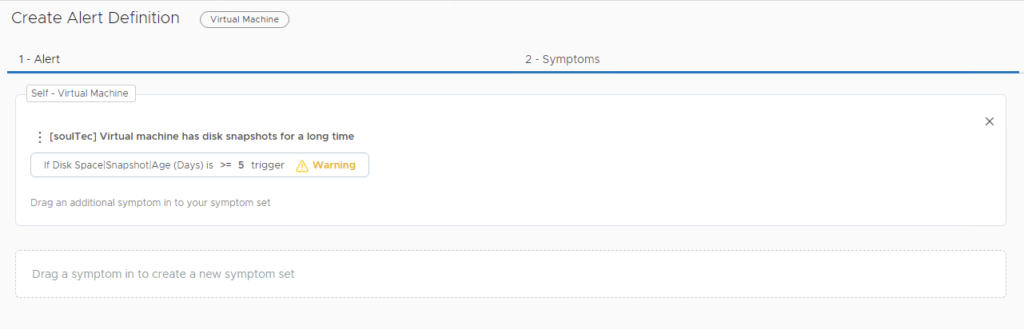
It should look like the above screenshot when you are done.
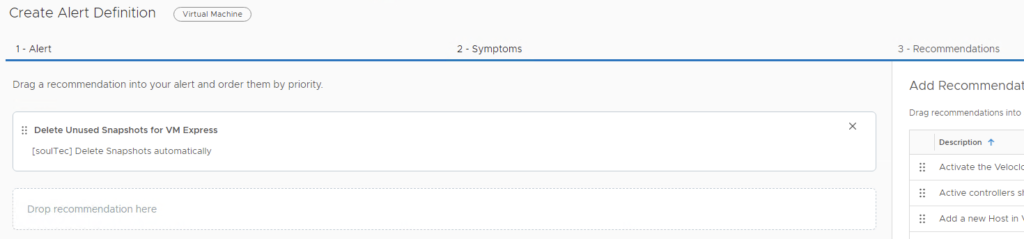
This step is only required in the alert in which you want to automation to be active. In our case we only did this for our critical alert that is triggered on 15 days old snapshots. In the “3 – Recommendations” Screen you will delete the default and replace it with the recommendation that we created earlier.
![]()
Your finished alert will look like the above screenshot after you complete the wizard. Repeat the custom Alert creator for the remaining Symptoms that you have created.
Edit a file on the vRealize Operations Manager to enable automation of the action
Unfortunately, VMware does not yet allow us to perform our action automatically. We need to change a file on the appliance itself to allow this. This is not officially supported by VMware at this time, but we have made many requests for this feature to be implemented in the future. If you have a cluster setup, you will need to perform this step on all appliances in the cluster.
File Location for vRealize Operations 8.x:
/usr/lib/vmware-vcops/user/plugins/inbound/vmwarevi_adapter3/conf
File Location for vRealize Operations below 8.x:
/usr/lib/vmware-vcops/user/plugins/inbound/PythonRemediationVcenterAdapter3/conf
Connect to your vRealize Operations appliance via SSH.
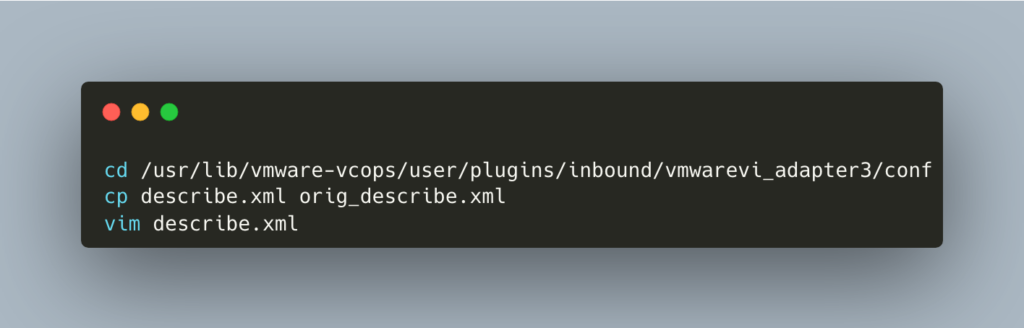
First we change to the directory, then we’ll take a security copy of the original and then open the file in the vim editor.
In the file search for “Delete Unused Snapshots for VM Express” (use “\” in vim and enter the search term followed by “enter”)
And change the following line from
<ActionContext automationPolicy=”none” key=”DeleteSnapshots” methodKey=”DeleteSnapshots”>
to
<ActionContext automationPolicy=”context” key=”DeleteSnapshots” methodKey=”DeleteSnapshots”>
This will enable the automation for that action. Save and close the file (ESC Key followed by “:wq” and “enter”). Remember to repeat this for all nodes in the cluster.
Redescribing the adapter
In order for vRealize Operations to see and implement our change we need to “redescribe” the vCenter adapter. This is a simple click of a button in the right place.
Go to Administration .. Support .. Redescribe
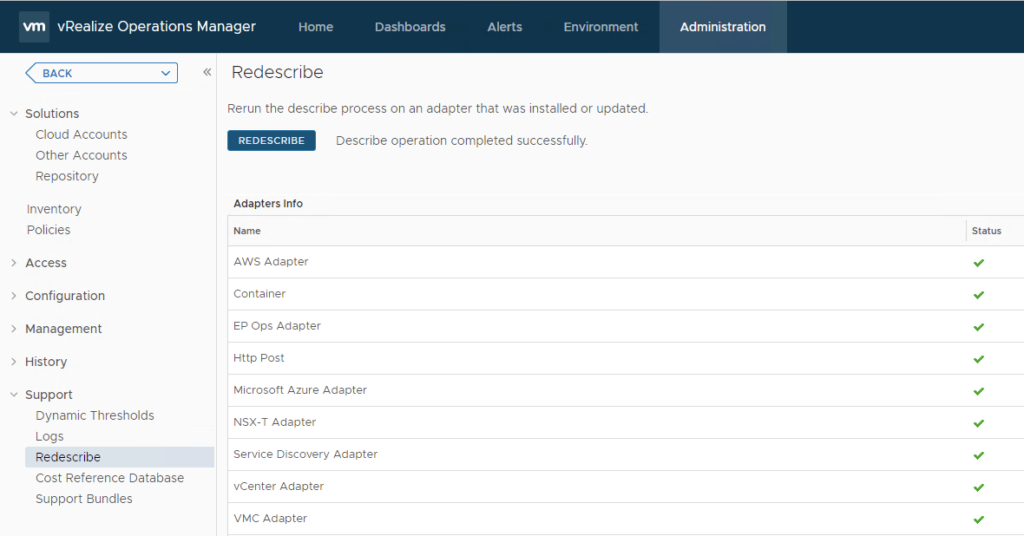
Now click on the “REDESCRIBE” button. This will take a couple of minutes and afterwards we can activate the automation in the policy.
Enabling the automation in the policy
The last step for this to work is to activate it in the policy. In order to do this we’ll click on “Policies” on the same screen we’re on right now (Administration … Solutions … Policies) .
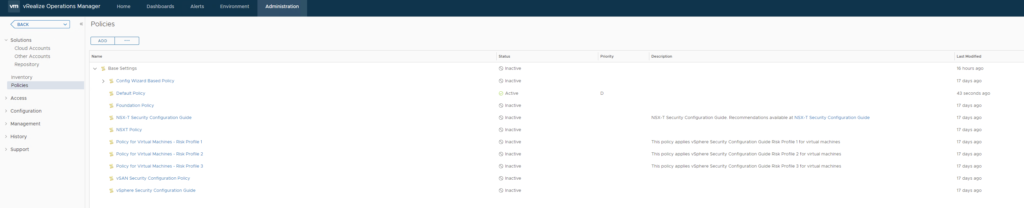
Select the Policy that is active in your environment.
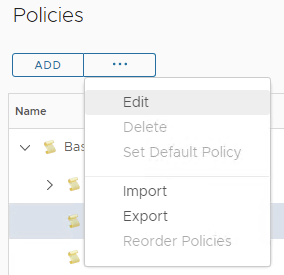
Click on the three dots (…) and select “Edit” in order to edit the selected policy.
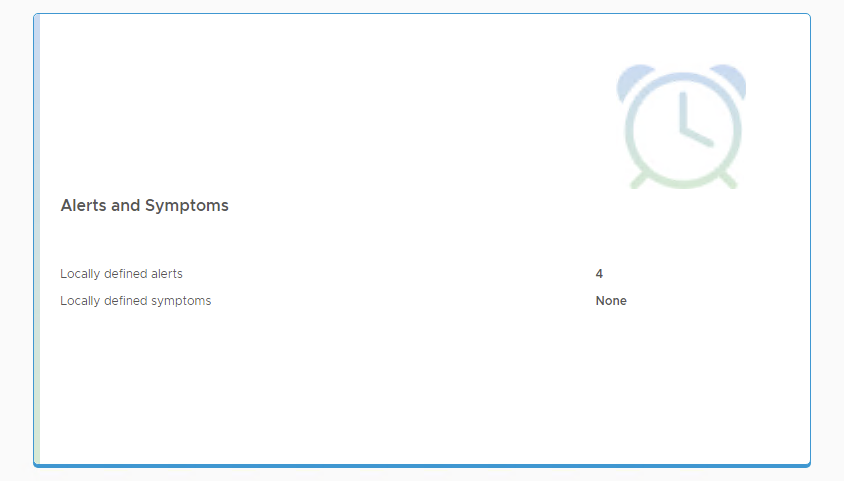
Click on the “Alerts and Symptoms” Rectangle to edit those features of the policy.
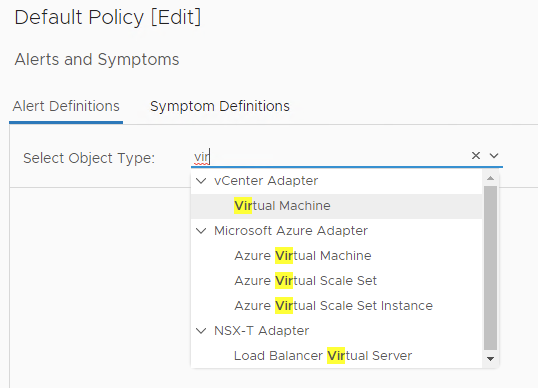
In the filter field for object type start typing “Virtual Machine” and click on the “Virtual Machine” unter the vCenter Adapter.

In the list you should find your custom alerts. In the “Automate” column you can now switch to “Enabled” in order to automatically delete VMware VM snapshots.

Click on Save and you are all set.
Activate automation on already triggered alerts
If you already have snapshots that should now be automatically removed, there is a good chance that these alarms were triggered before you enabled automation, and therefore were not automatically removed. In order to remedy this, just cancel all those alerts. They will be triggered again in the next cycle and then the automation will be triggered as well.
Future Updates of vRealize Operations
This feature still works with the latest version, as of this writing. But every time you update your vRealize Operations Manager, the changes you made to the xml file will be overwritten. So bookmark this post and do the edit and redescribe again after each update.
Inspiration and more information
If you want to learn more about vRealize Operations Manager and other VMware-related stuff, visit the blog of our Swiss VMware vExpert colleague vMan.ch. He has written posts about this very feature in the past and is an excellent source of information.
If you would like to work with us or discuss ideas for your VMware solutions, please feel free to contact us at any time.


Comments (8)
Excellent article, I was just figuring out for snapshot where I can use the keyword like don’t delete the snapshot. I need to exclude those snapshot. Will it be possible with vrops.
Thanks
Hi Rajmani,
I don’t think this is possible. You would have to be able to exclude those from raising an alert in the first place because the automation is triggered on the alert.
I think you could do this by excluding those VM objects from the policy where your alert is defined in, but that would have to be investigated further.
Best Regards
Hi,
Thanks for your post. I am reaching last step and face automate option can’t change. Can you advise what is the issue?
Hi Sovannaroth,
Did you change the file on all of your vROPs Nodes before you did the “Redescribe”? This is where the Automation option is getting enabled on the delete snapshot alert.
I tried the same but looks not working on vrops 8.2 standard.
Kindly help
Hi Jitendra,
It still works with vROPS 8.6.2 and should therefore also work for 8.2 Standard. Have you followed the steps in the blog?
Question: Does this require that ‘Operational Actions’ are enabled in the Integration?
Hi Daniel,
No, this does not use the python Actions but overrides a built-in action.