
[How-To] Install IGEL Cloud Gateway in a DMZ
The IGEL Cloud Gateway allows IGEL devices outside the corporate network to communicate securely with the internal IGEL Universal Management Suite.
This guide explains how to install the ICG on an Ubuntu server in a DMZ and connect it to the UMS.
Requirements
Before starting, make sure the following requirements are met:
– Supported Ubuntu server in the DMZ
– SSH user with sudo permissions
– UMS license with ICG functionality
– TCP port 8443 accessible from the UMS and the internet
– SSH port 22 accessible from the administration network
– Public address with port forwarding to the ICG
Check the Ubuntu Server
Connect to the Ubuntu server through SSH:
ssh username@internal-icg-address
Check the Ubuntu version and available resources:
sudo -v
lsb_release -a
free -h
nproc
df -h /
Check whether the system clock is synchronized:
timedatectl status
The result should show:
System clock synchronized: yes
NTP service: active
Check whether port 8443 is already in use:
sudo ss -ltnp 'sport = :8443'
If no process is displayed, the port is available.
Open the ICG Remote Installer
Open the classic IGEL UMS Console and navigate to:
UMS Administration > UMS Network > IGEL Cloud Gateway
Click Install new IGEL Cloud Gateway.
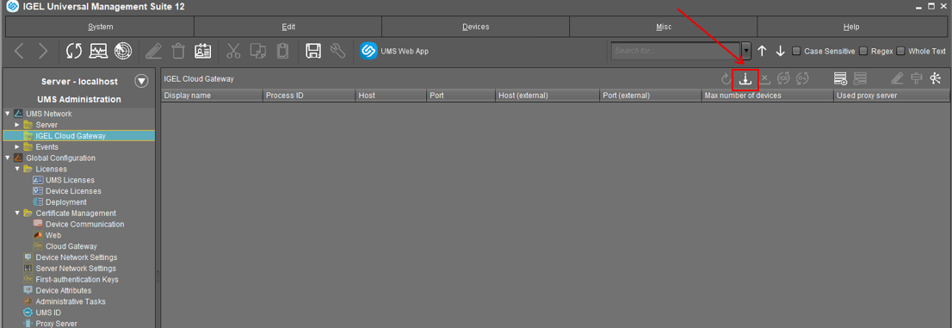
If the installation option is unavailable, check whether the active UMS license includes ICG functionality.
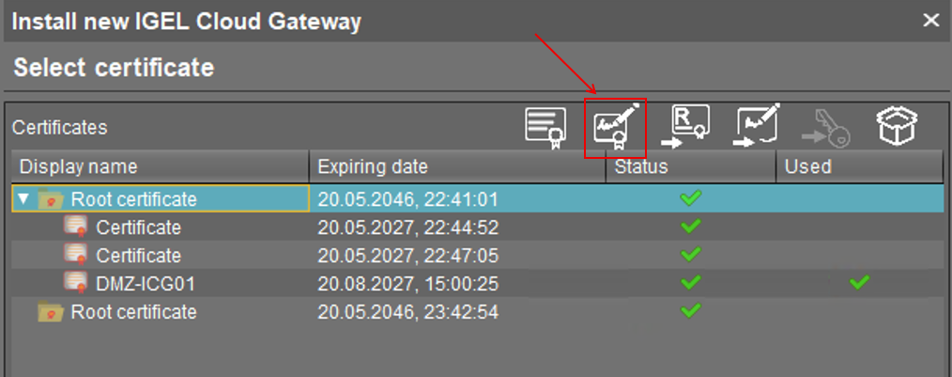
Select the root certificate that should be used for the gateway and click Create signed certificate.
Enter the certificate information:
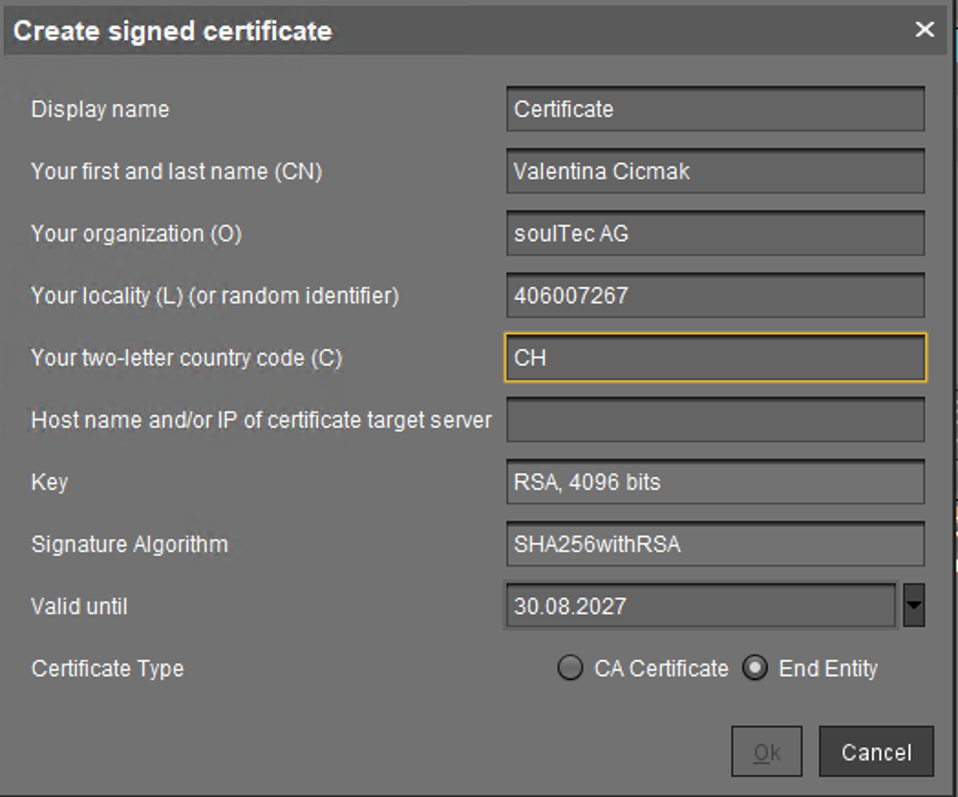
Host name and/or IP of certificate target server: The internal and external addresses must be included in the certificate. For production environments, use fully qualified domain names whenever possible.
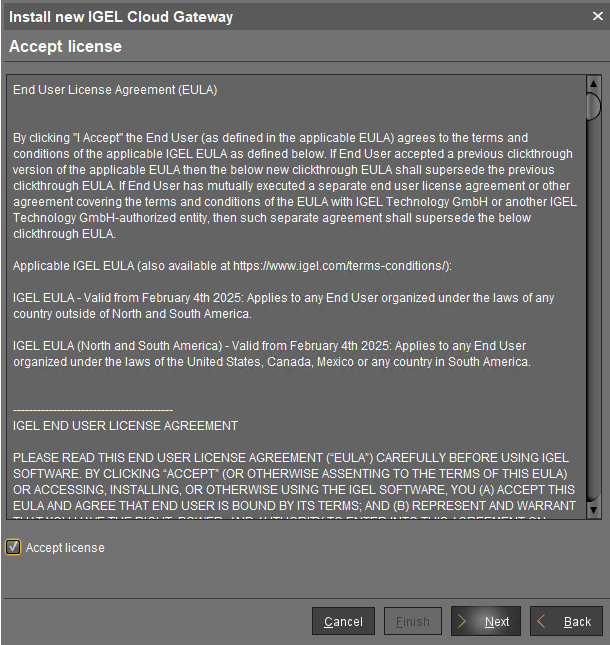
Accept the license agreement and click Next.
Verify the automatically populated installation settings and enter the SSH credentials:
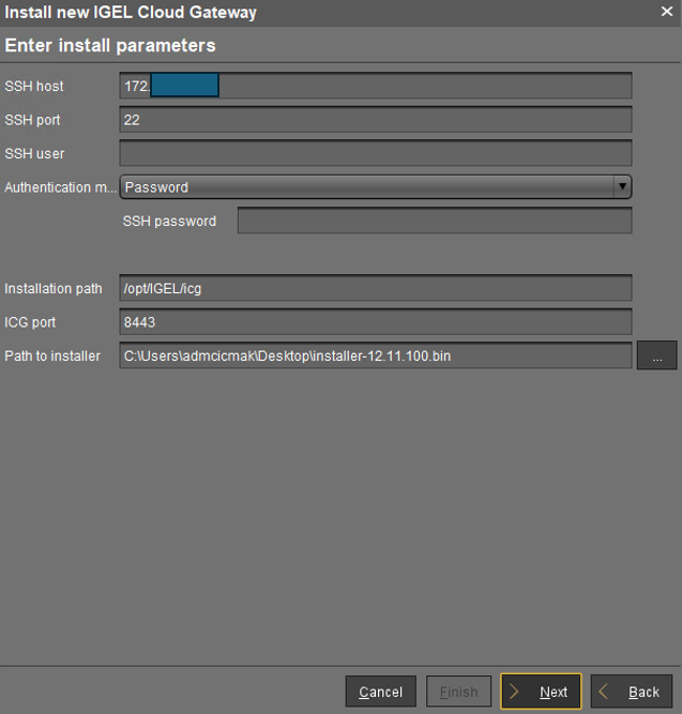
Do not use `icg` as the SSH username because it is reserved for the ICG service.
Click Next to start the installation.
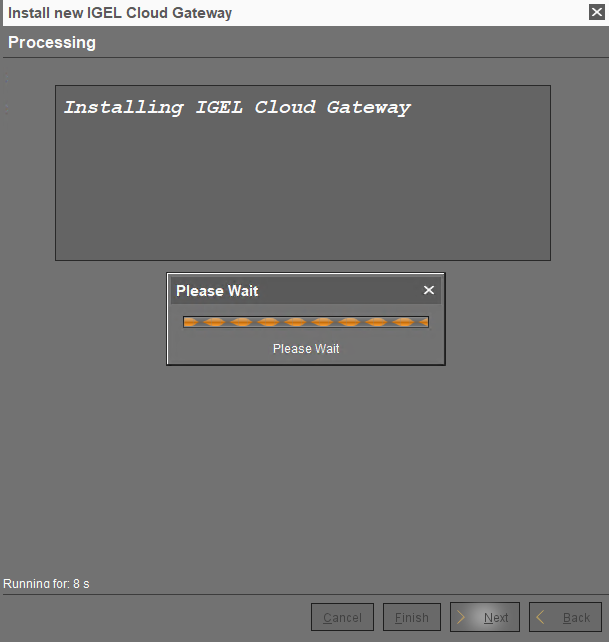
The UMS transfers and installs the required ICG components automatically.
When the installation is complete, the following message appears:
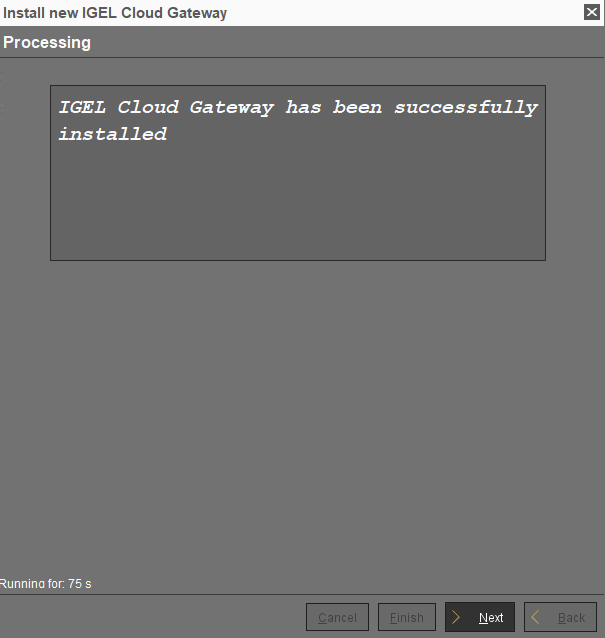
Click Next.
Enter the internal and external connection details:
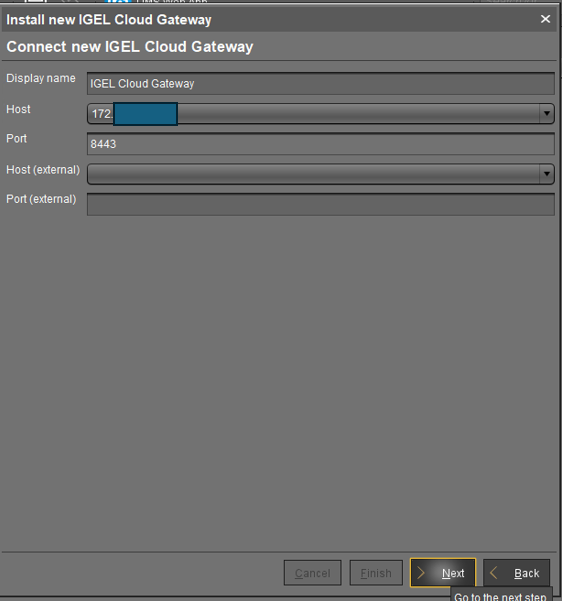
Host is the internal address used by the UMS.
Host (external) is the public address used by external IGEL devices.
Both addresses must be included in the ICG certificate.
Click Next.
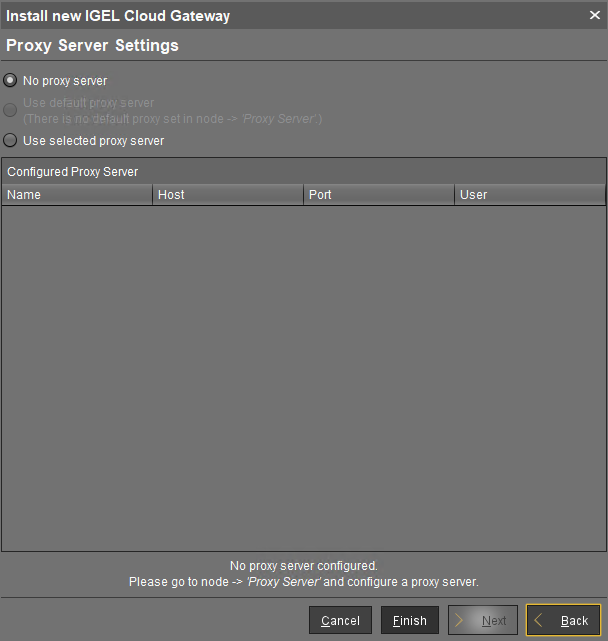
Select No proxy server if no proxy is required and complete the installation with Finish.
Verify the ICG Status
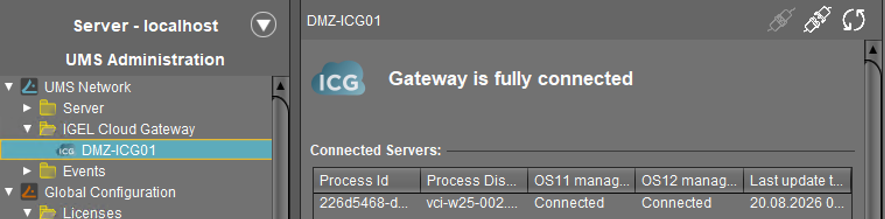
Navigate to:
UMS Administration > UMS Network > IGEL Cloud Gateway
Check whether the gateway is running and connected to the UMS.
Test the External Connection
Connect a Windows device to an external network and run:
Test-NetConnection <public-icg-address> -Port 8443
The result should show:
TcpTestSucceeded : True
Next Steps
If you’ve read this far then chances are you are still having issues. Feel free to reach out to us. We’re happy to help out!









Leave a Reply