[How-To] Build your own Homelab – Part 1
In this blog series, I want to take you on the adventures I undertook to build my own nested NSX & Tanzu homelab. This endeavor encountered some issues, as expected from a nested configuration. I aim to document my steps, and perhaps it can help someone looking to embark on a similar project.
1. Premise
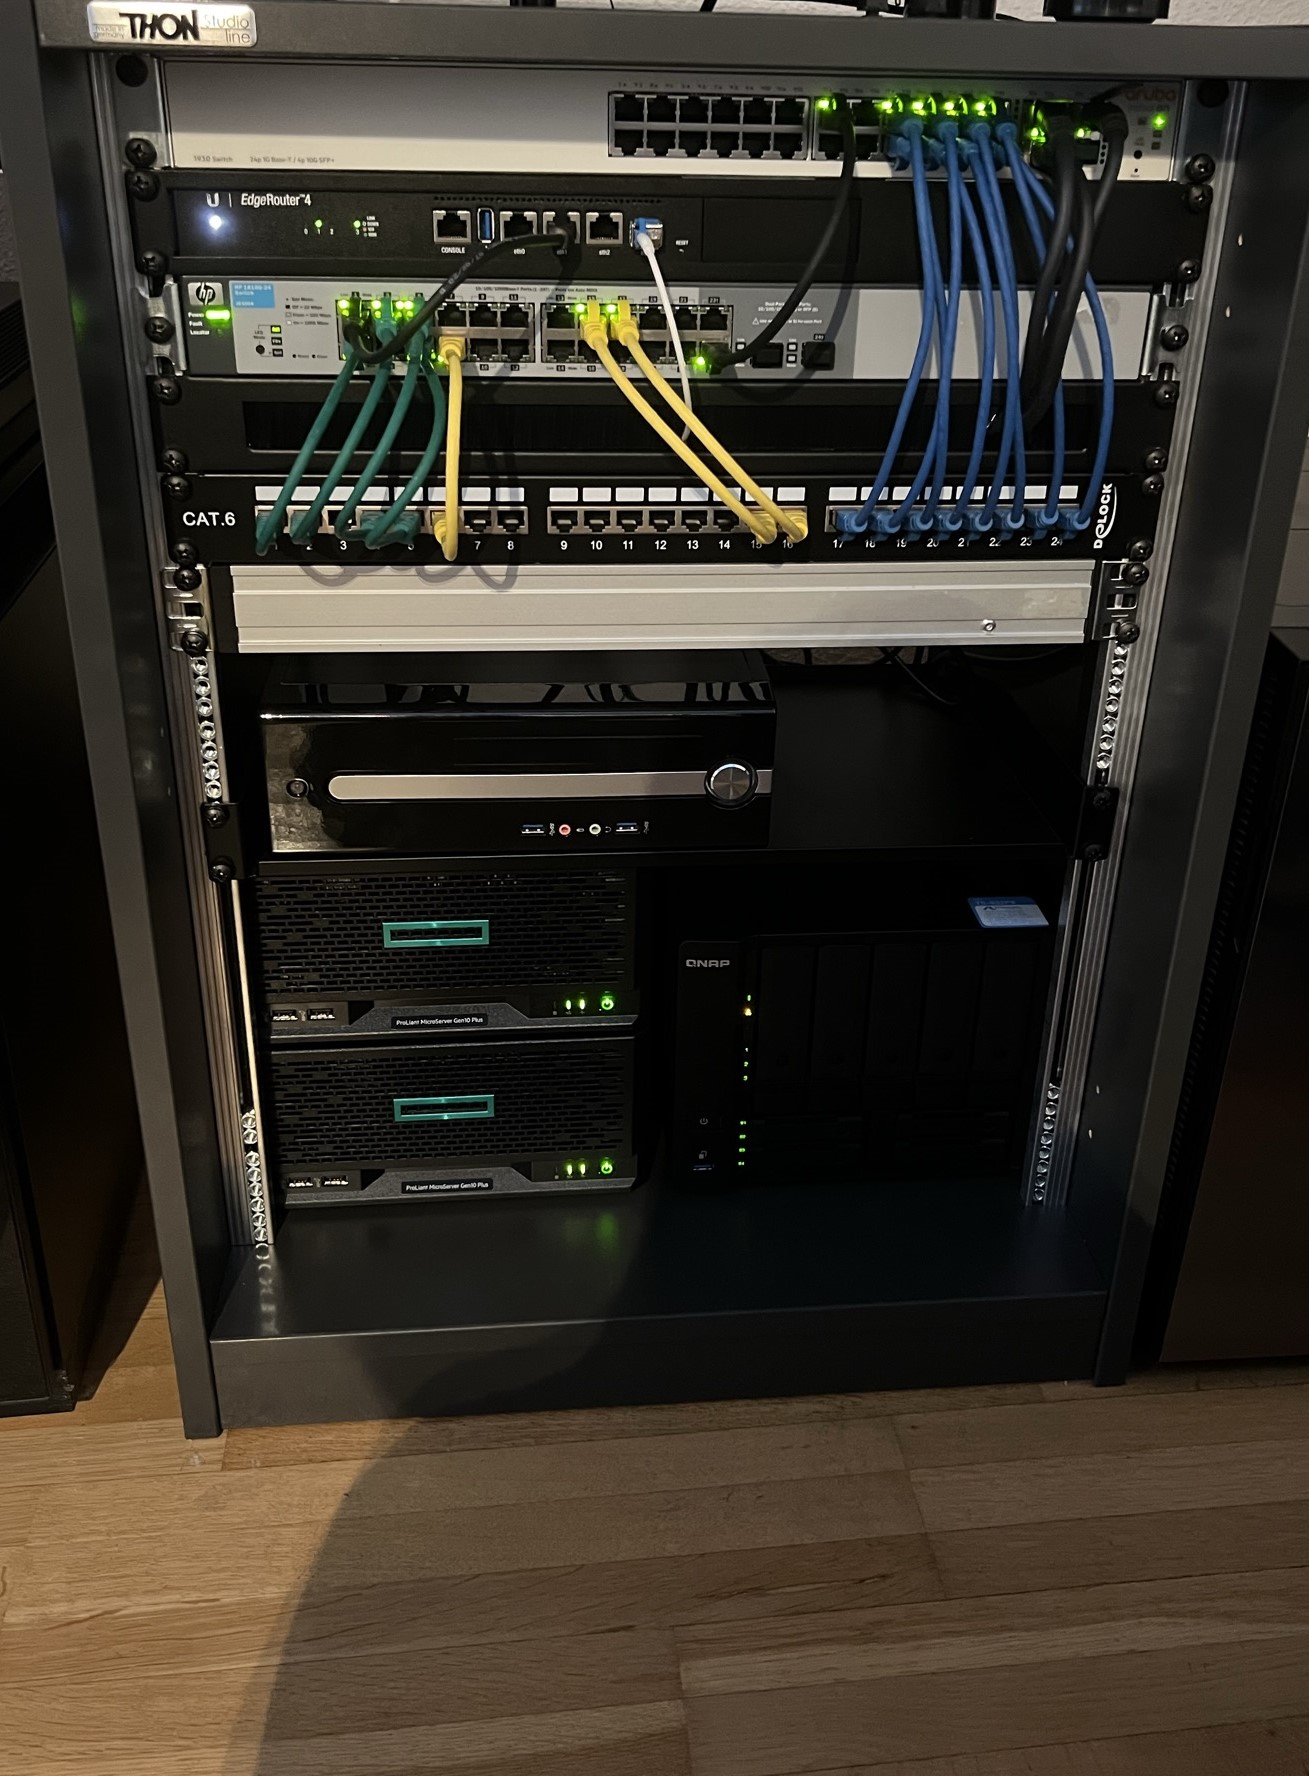
I already had some homelab components set up, mostly in a small and energy-efficient manner. Due to my living arrangements – residing in an apartment without the possibility of running a full rack configuration in the basement or a dedicated server room – my homelab occupies my living room. As you can imagine, neither I nor my partner would be pleased with a large and noisy server rack in our living space.
To accommodate these constraints, I had to resist the temptation to buy second-hand enterprise equipment. While they often offer good deals with substantial computing performance at a low cost, they tend to be noisy and energy-inefficient. Instead, I opted for two HPE Proliant MicroServers Gen10 with 64GB of RAM each, a NAS for shared storage, and some network components. Although these servers worked well for my basic infrastructure lab needs (such as vSphere and AD), they lacked the power required for serious NSX workloads.
It was time for something more robust…
2. Hardware
Encountering the same problem again, I needed hardware that wouldn’t break the bank but had enough resources for my NSX and Tanzu requirements. Old enterprise servers were ruled out due to heat and noise. Quiet, low-power servers were an option, but they were expensive, and I’d need a cluster of them to meet my needs. Considering options like the SuperMicro SuperServer E300-9D-8CN8TP, a fantastic server albeit expensive (nearly 2000 CHF without RAM per server), wasn’t the most affordable solution.
Contemplating a nested homelab, I accepted the trade-offs of not achieving real high-availability and facing some performance loss due to the nature of nested hypervisors. Yet, for the sake of a lab environment, these compromises seemed acceptable. Additionally, I could house these components in a standard desktop case or even a 4U server case, employing slow-spinning fans for a powerful and quiet server. That’s precisely what I did, and my final setup included:
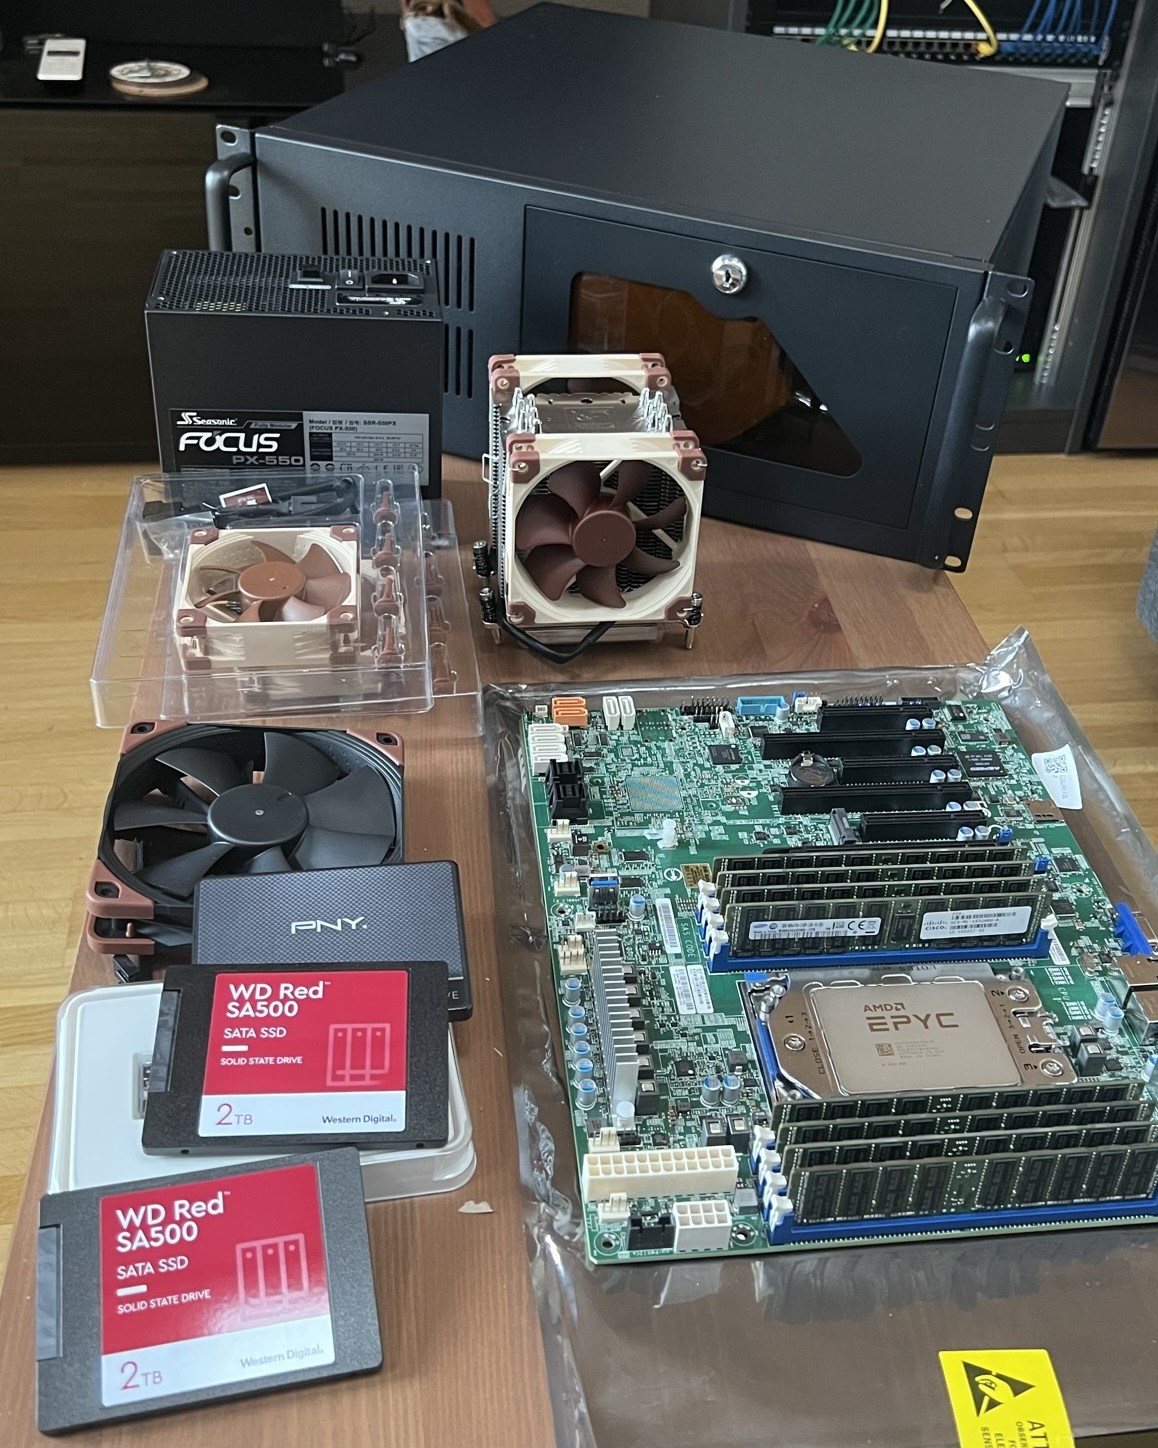 Components:
- SuperMicro H11SSL-i SP3 Motherboard
- AMD Epyc 7551P 32 Core 64 Thread CPU
- 256GB RDIMM DDR4 2133 RAM
- Seasonic PX-550 550W ATX Power Supply
- Noctua NF-F12 120mm FAN Intake
- 2x Noctua NF-A8 80mm FAN Exhaust
- Noctua NH-U9 TR4-SP3 CPU Fan
- Intertech IPC 4U-4088-S 4U Server Case
- Various SSDs for Boot and Storage
This setup cost me less than half of what a single SuperMicro E300 server would have cost. A deal I considered quite favorable.
With the hardware in place, I was ready to proceed to the next step: installing all the required infrastructure components. To simulate a “close-to-real-life” environment, I planned to set up a 3-node configuration with vCenter, DNS, AD, and other necessary components running directly on the host. Subsequently, I would install 3 nested ESXi VMs with 8 Cores and 64GB of RAM each. This theoretically provides a balanced distribution of resources between the host and the nested ESXi instances. Whether it will work, well, that’s a discovery for the next part…


Leave a Reply