[How-To] Build a Test Environment for OPSWAT MetaDefender Managed File Transfer
In this guide, you will build a simple test environment for OPSWAT MetaDefender Managed File Transfer, also known as MFT. You will install SQL Server, prepare the database login, install OPSWAT MFT, configure the web interface, create users, and test file sharing.
This guide is meant for a lab environment. It is not a production hardening guide. In production, you should use HTTPS, valid certificates, proper SMTP, backups, monitoring, firewall rules, and a secure SQL Server configuration.
Lab Overview
You will build a basic MFT environment with Microsoft SQL Server 2022 Express, SQL Server Management Studio, OPSWAT MetaDefender Managed File Transfer, and local test users.
The goal is to make the application work, understand the setup process, and test file upload and sharing between users.
Install Microsoft SQL Server
Download Link: Download Microsoft® SQL Server® 2022 Express from Official Microsoft Download Center
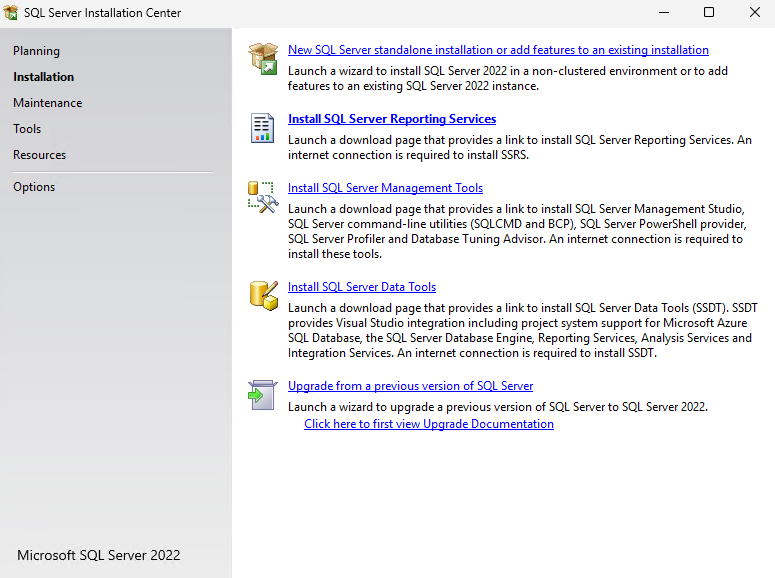
Start in the SQL Server Installation Center. This is where you begin the installation of a new SQL Server instance. Choose the option for a new standalone SQL Server installation.
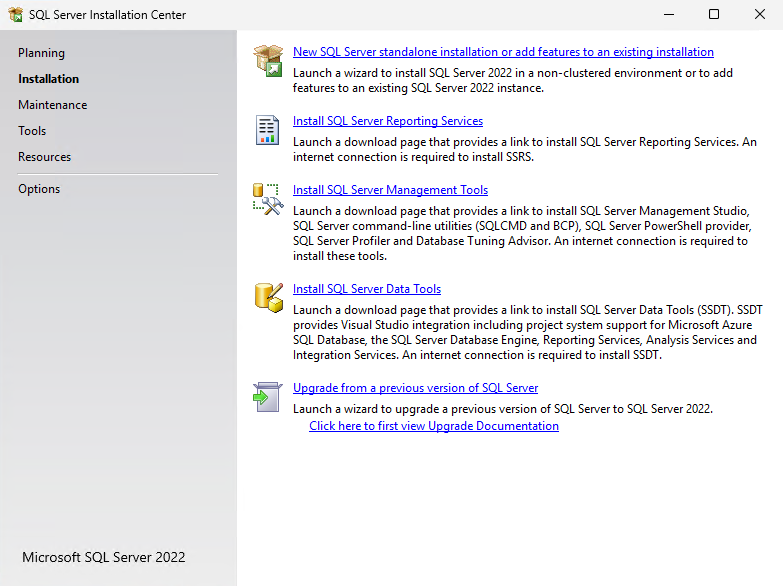
On the feature selection page, you only need Database Engine Services for this test setup. You do not need Reporting Services, Machine Learning Services, PolyBase, or LocalDB.
Configure the SQL Server Instance
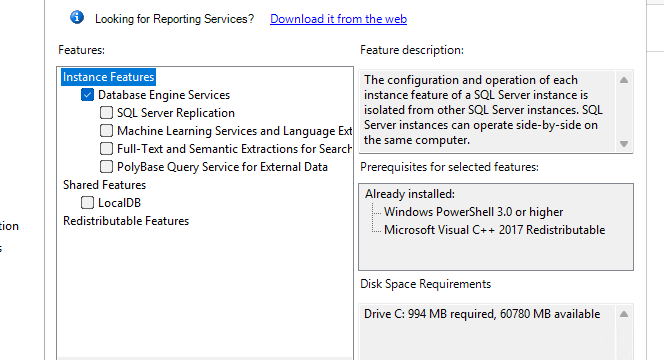
On the Instance Configuration page, use a named instance. In this lab, the instance name is SQLEXPRESS. This makes the SQL Server easy to identify later.
After the installation, you can connect to the SQL Server with localhost\SQLEXPRESS when you are working directly on the server.
Keep the Default Service Configuration
On the Server Configuration page, you can leave the default service accounts as they are. Make sure the SQL Server Database Engine startup type is set to Automatic.
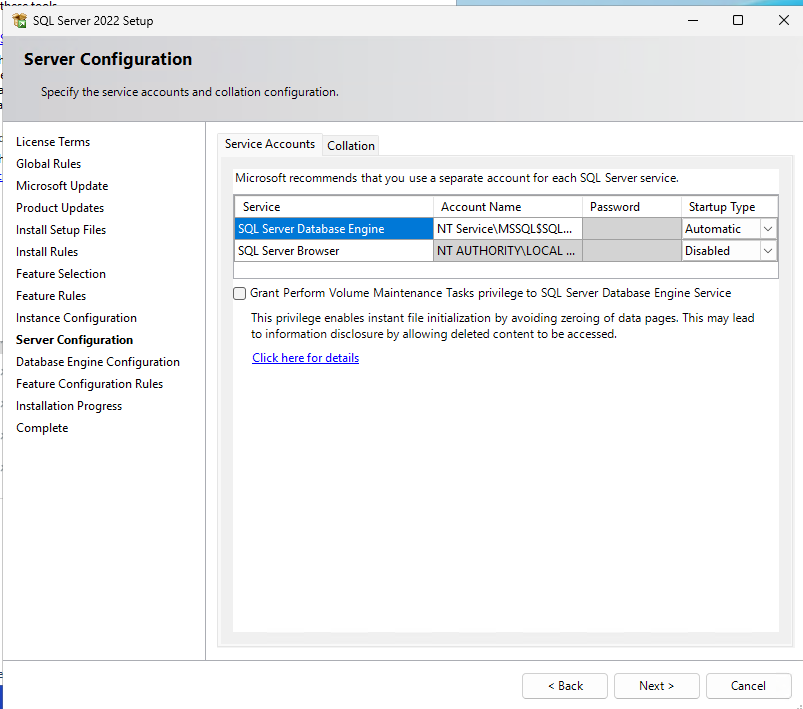
This makes sure SQL Server starts automatically after a reboot.
Configure Database Authentication
On the Database Engine Configuration page, choose Mixed Mode. This allows both Windows authentication and SQL Server authentication.
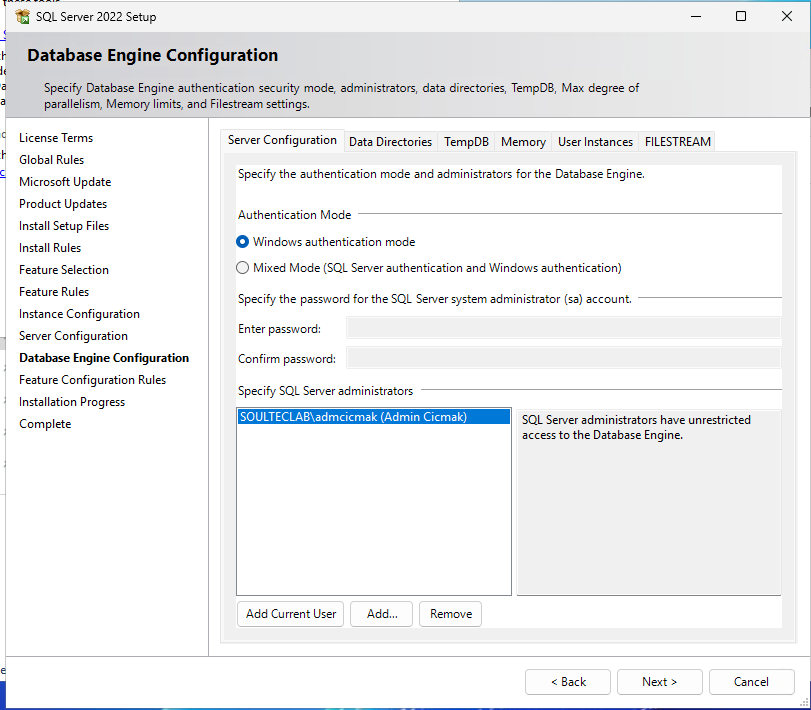
Set a strong password for the sa account. Also make sure your Windows admin user is listed as a SQL Server administrator.
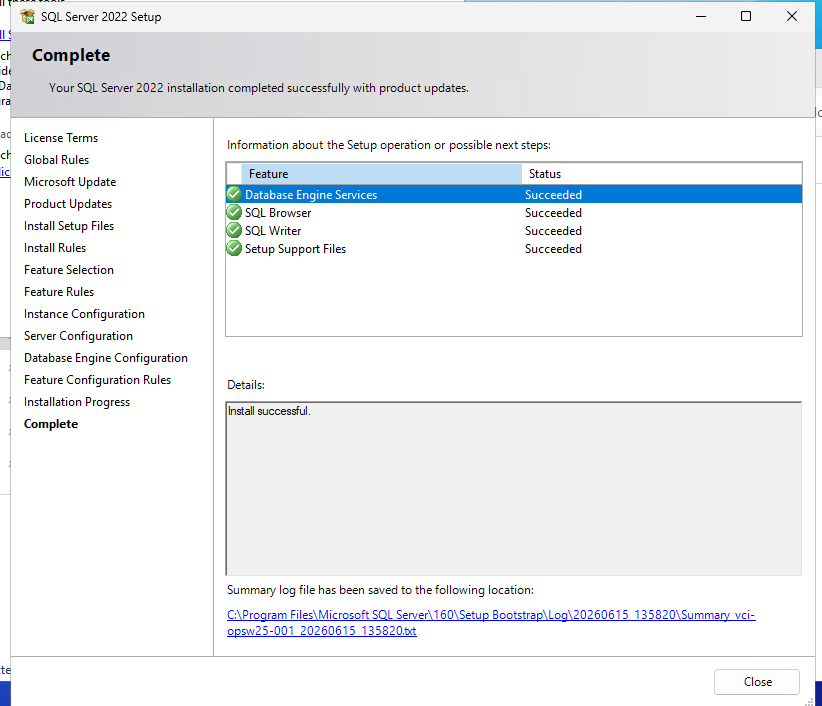
After that, continue the installation. When the installation is complete, all required components should show the status Succeeded.
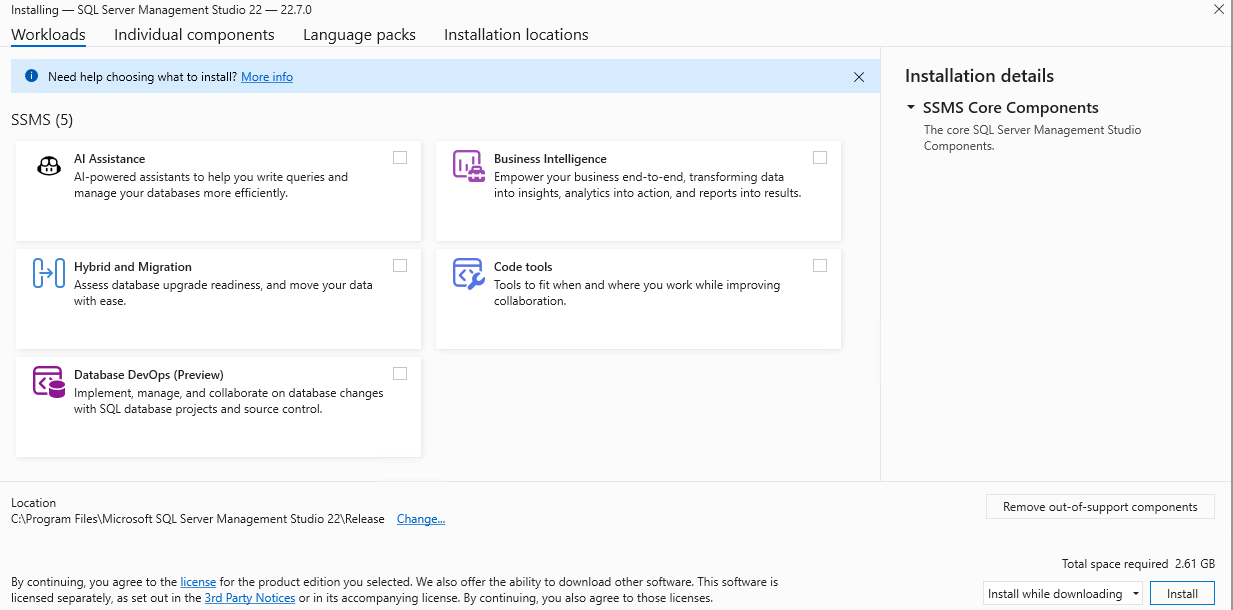
Install SQL Server Management Studio
After SQL Server is installed, install SQL Server Management Studio. Go back to the SQL Server Installation Center and choose Install SQL Server Management Tools.
The SSMS installer opens through the Visual Studio Installer. For this lab, you do not need extra workloads. Leave the optional components unchecked and start the installation.
The installation can take some time. If the installer recommends a reboot, restart the server before you continue.
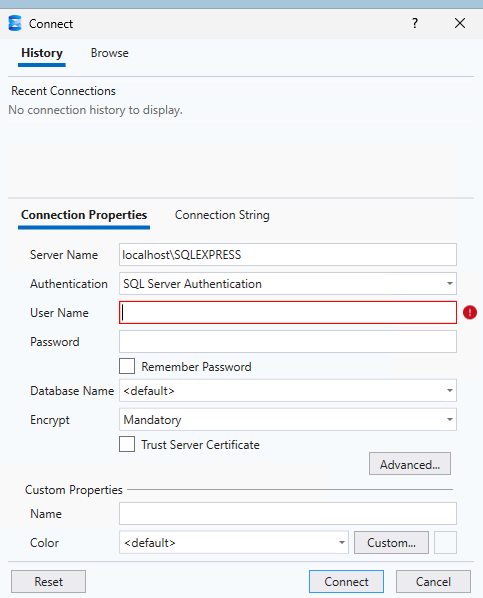
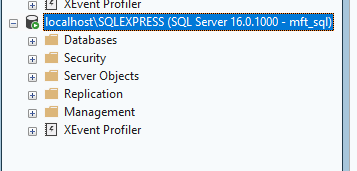
Connect to SQL Server with SSMS
Open SQL Server Management Studio and connect to your SQL Server instance. Use localhost\SQLEXPRESS as the server name and Windows Authentication as the authentication method.
If SSMS shows a certificate warning, enable Trust Server Certificate and connect again.
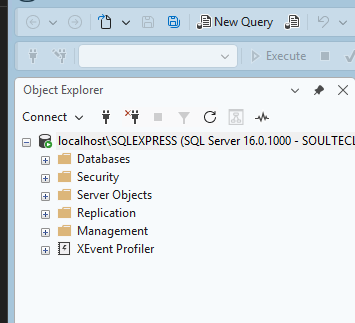
After the connection works, you should see your SQL Server instance in the Object Explorer.
Create a SQL Login for OPSWAT MFT
Now create a dedicated SQL login for OPSWAT MFT. In SSMS, open Security, then Logins, then New Login.
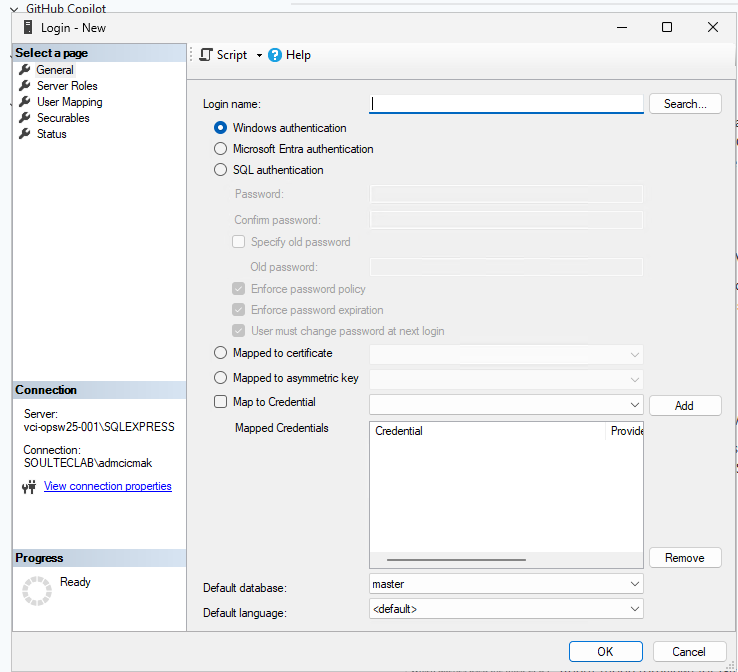
Create a SQL Server authentication login named mft_sql and set a strong password. For a lab setup, you can disable the password policy options if needed.
Then open Server Roles and add dbcreator. This allows the OPSWAT MFT installer to create the required databases.
After creating the login, test it by connecting again in SSMS with SQL Server Authentication, the username mft_sql, and the password you created.
If the connection works, the SQL login is ready for the OPSWAT MFT installer.
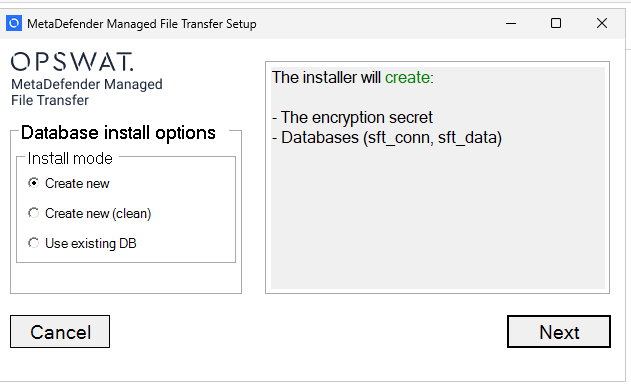
Start the OPSWAT MFT Installer
Download Link: MetaDefender Managed File Transfer – My OPSWAT
Start the MetaDefender Managed File Transfer Setup. When the installer asks for the database install option, choose Create new.
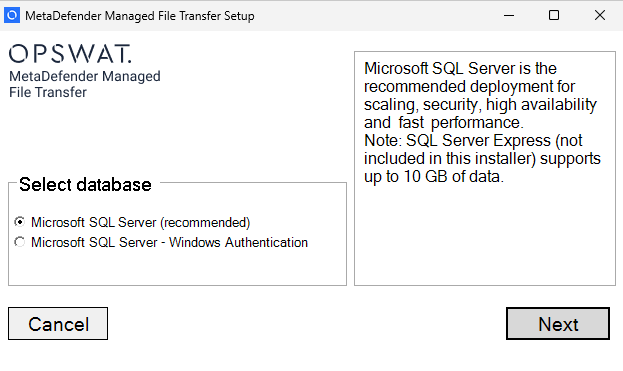
On the next page, choose Microsoft SQL Server recommended.
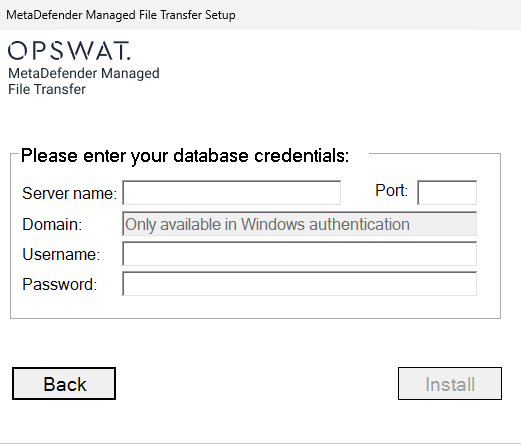
Then enter the database connection information. Use localhost\SQLEXPRESS as the server name, leave the port empty, use mft_sql as the username, and enter the password you created.
The installer will create the required databases, including sft_conn and sft_data.
Configure SMTP Later
During the first configuration, OPSWAT MFT may ask for SMTP settings. SMTP is used for email notifications, invitations, and password resets.
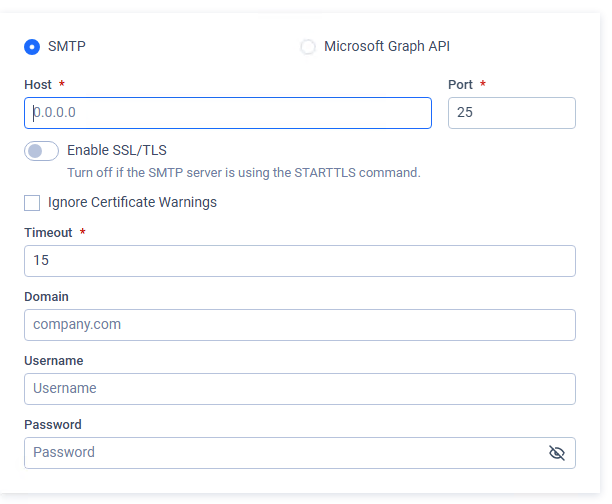
For a basic test environment, you can skip this step if the application allows it. Without SMTP, you can still test login, upload, download, and sharing. Email features will not work until SMTP is configured.
Configure the MFT Server URL
Next, configure the host details for your MFT server. In this lab, the host is vci-opsw25-001 and the port is 8010.
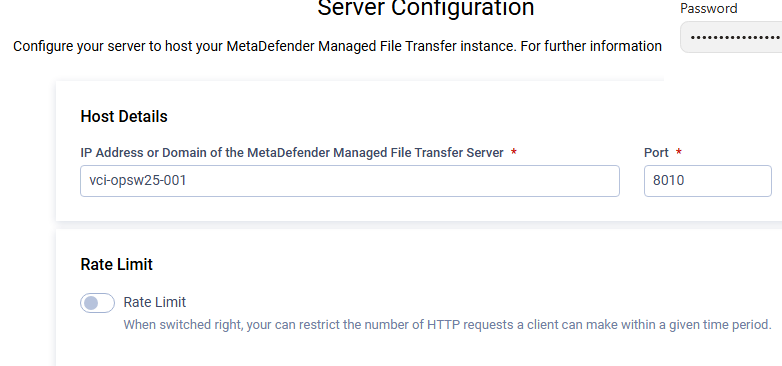
In this lab, the web interface is available at http://vci-opsw25-001:8010. In your own environment, replace vci-opsw25-001 with the hostname or FQDN of your OPSWAT MFT server. If another client cannot open the page, verify DNS name resolution for your host and check that the Windows Firewall allows inbound traffic on port 8010.
Skip HTTPS for the First Lab Test
You may see the HTTPS configuration page. For a simple isolated lab, you can leave HTTPS disabled and continue with HTTP.
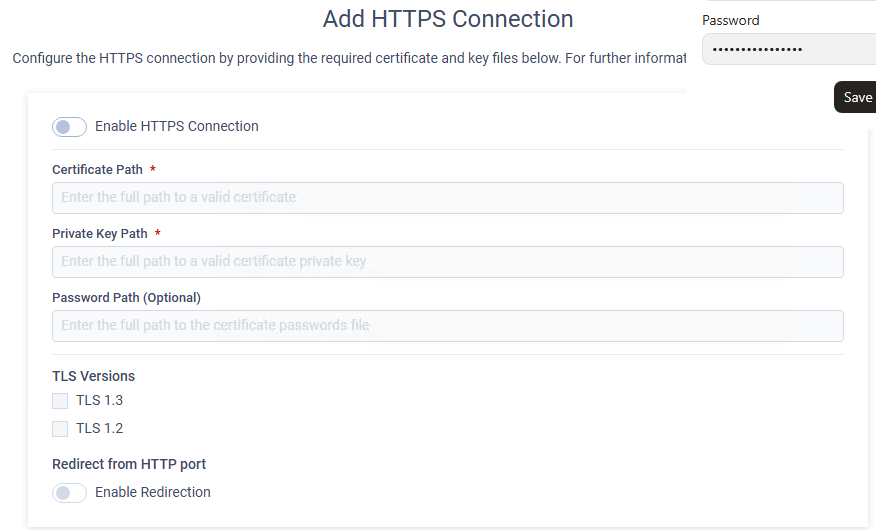
For production, you should not leave this disabled. A production setup should use HTTPS with a valid certificate and private key.
Skip Product Management Enrollment
You may see a Product Management Enrollment window for OPSWAT Central Management. For a standalone lab, you can close this window.
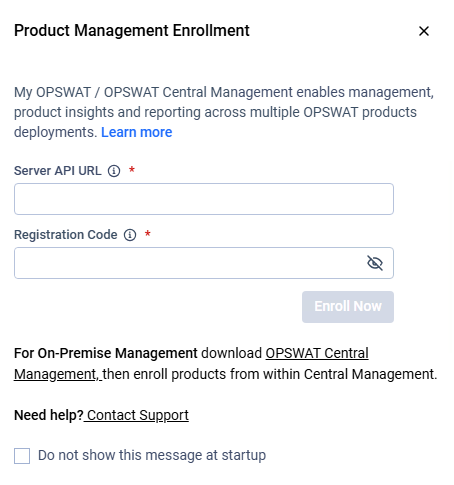
You can also enable the option that prevents this message from appearing again at startup.
Open the MFT Web Interface
After setup, open the MFT web interface in your browser. You should see the My Files page.
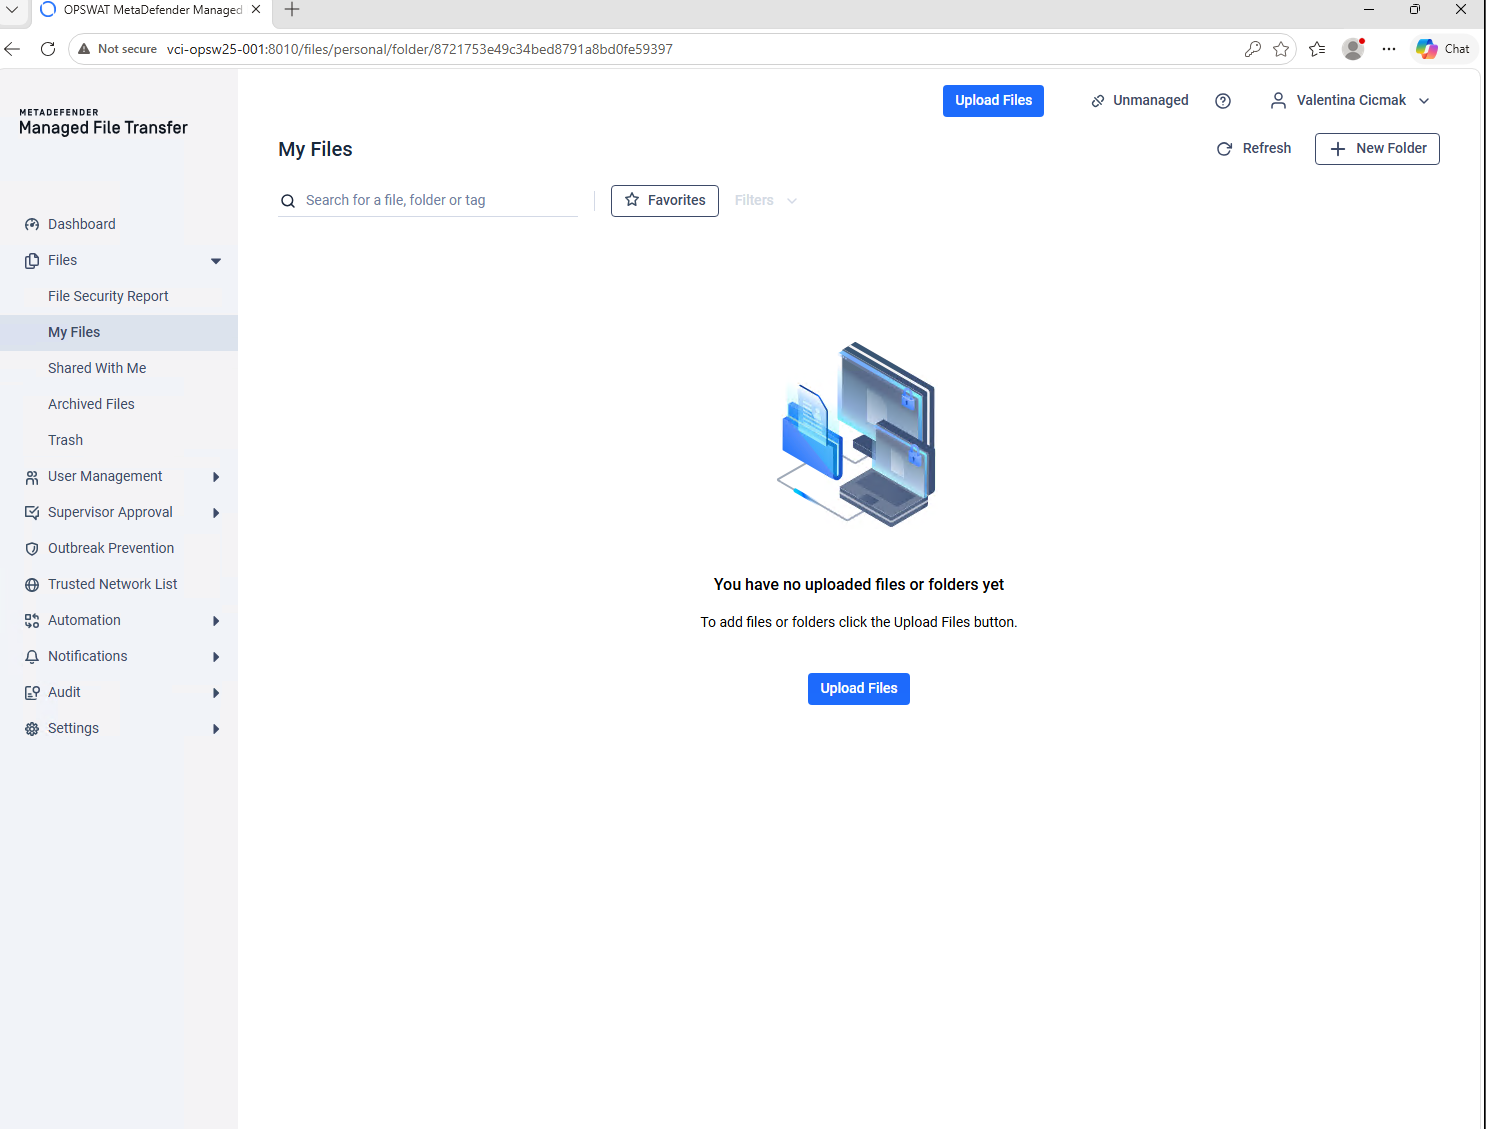
This is where users upload files, create folders, manage files, and share files with other users. To test the setup, upload a small test file.
Access MFT from a Client Machine
On a client machine, you normally do not need to install anything for basic MFT usage. You only need a browser.
Open http://vci-opsw25-001:8010 and log in with a valid MFT user account. In this lab, vci-opsw25-001 is the hostname of the MFT server. In your own environment, replace it with your own server hostname or FQDN.
If the page does not open, check whether the client can resolve the server name, whether the server is reachable, whether port 8010 is open, and whether the MFT service is running.
Create a Second User and Test Sharing
To test sharing, create a second user in MFT. Then log in as the first user, upload a file, and share it with the second user.
After that, log in as the second user and open Shared With Me. The shared file should appear there.
Understand the MetaDefender Core Warning
When you open a shared file, you may see a message saying that MetaDefender Core is disabled.
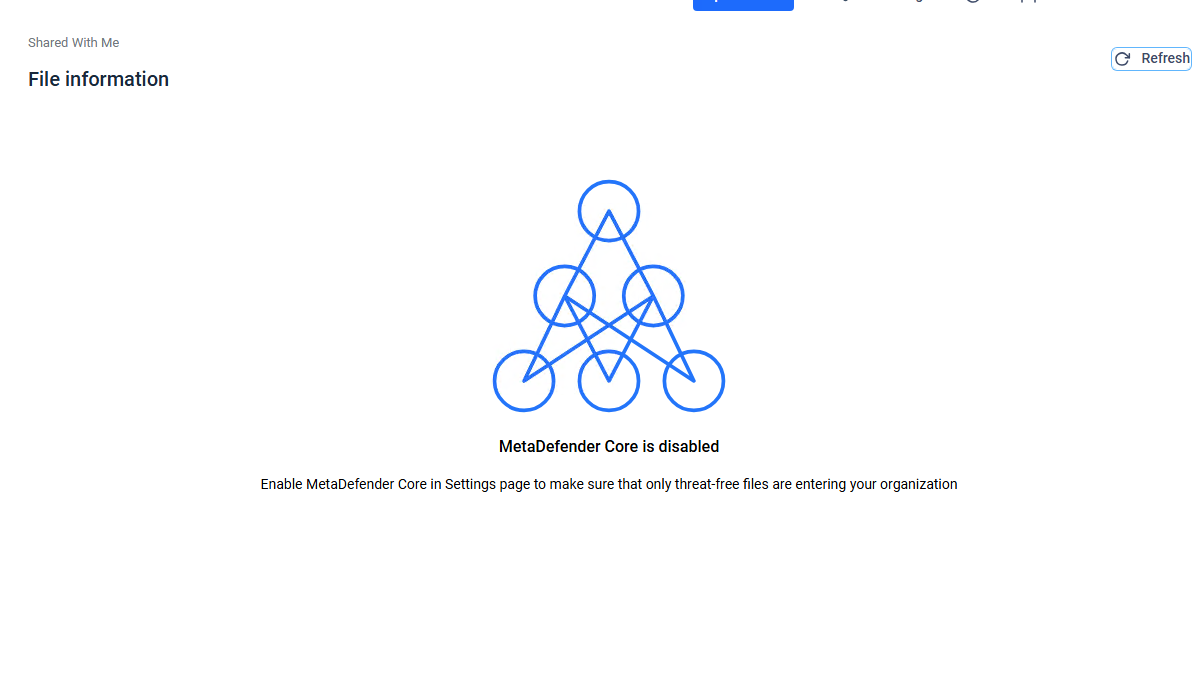
This does not mean that sharing is broken. It only means that MFT is not currently connected to MetaDefender Core for malware scanning.
For a basic lab, you can continue testing uploads and sharing without MetaDefender Core. If you want security scanning, you need to connect MFT to a MetaDefender Core server.
Final Test
At the end of the setup, test that SQL Server is running, SSMS can connect to localhost\SQLEXPRESS, the mft_sql login works, OPSWAT MFT can connect to SQL Server, the web interface opens on port 8010, one user can upload files, and another user can receive shared files.
If these tests work, your basic OPSWAT MFT test environment is ready.
Next Steps
If you’ve read this far then chances are you are still having issues. Feel free to reach out to us. We’re happy to help out!


Leave a Reply